Creating a video or movie is not difficult. Creating a good quality video, on the other hand, requires a good editing tool. You are not going to cut clips all the time. However, as long as you have an editing tool that meets your needs, you can at least produce something that is visible.
Make your video files
It is always a good idea to combine the source files for your video project into a single directory. It does not make it easy to find the files to import in Movie Editor. It also provides the opportunity to review the files.
Usually, all video files are not 100 percent helpful. Alternatively, you can use some particles rather than the whole clip. By reviewing the files, you not only review the entire scene but also give yourself time to specify the timestamps of the scenes you want to use in your video project.
Also, remember to give the folder an appropriate, meaningful name so you can find it easily.
When you start NeoFilm for the first time, you will see a simple application window waiting for your inputs. None of the permission popup boxes, no welcome screen. All options are there, which you can use easily.
Import the video and arrange it in chronological order
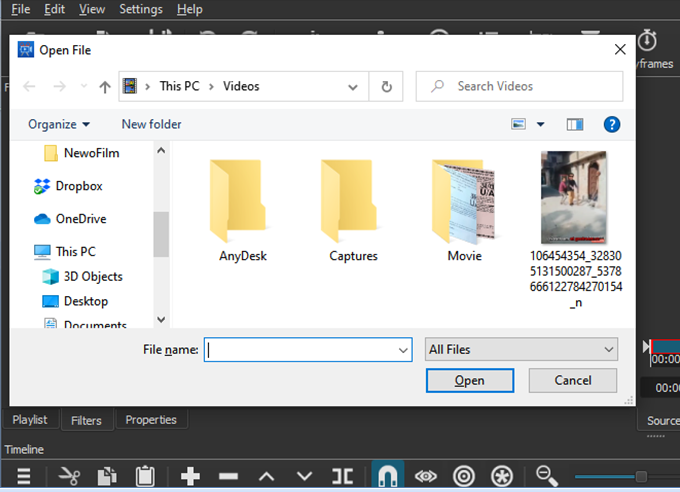
When it’s time to start your video project, import the files you need via Open File. Wait for the files to be imported – remember that the first video will run automatically, so be prepared to pause this if necessary.
- Once the files have been imported, press Ctrl + S to save the project (or open File> Save) before you can do anything else. Also, remember to provide it a meaningful name too.
- In the main NeoFilm window, you will see how the imported files are listed in the left-hand panel (playlist) and the currently selected file will be displayed in the main window.
- Look at the player controls, which you can use to play, pause, tap back and forth through the video, and drag and drop using the playlist (white line showing the current state of the video).
- Before you can start editing your video together, you need a timeline.
- It does not appear by default – to view it, open the Display menu, and select Timeline.
All you have to do now is start organizing your video clips chronologically, maybe with some stills and audio. By default, you will see single, linear timelines, but you can add new tracks if needed. For example, it can be useful to create a video that selects shots at the same time.
To add a video or audio track read our guide here.
Trim and cut
If you need to organize a clip, the best way to do this is to drag the locations at the beginning and end of the clip until they reach the desired time.
- If you want multiple parts from the same video clip, re-import it, and organize each shot as needed.
- In the meantime, you can cut or split a clip. Place the playlist where you want to split and click the Playhead at Playhead button.
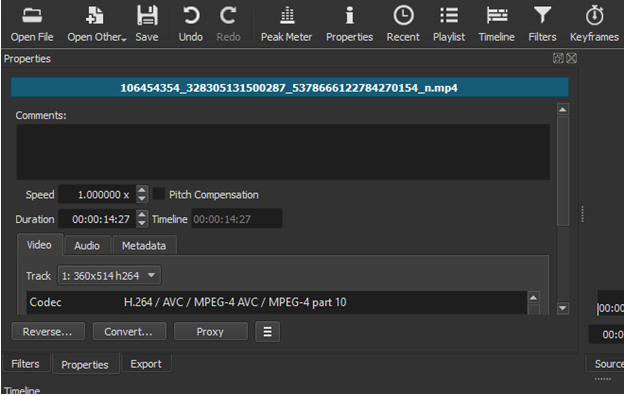
- If you want to change the speed of your video clip, select it, and click Properties.
- Most importantly, you will see the speed, which is set to 1.000x by default. Use the up-down arrows to adjust it.
Make the right changes
Creating a clip transition is easy:
- Just drag the two clips to each other so that they slightly overlap.
- You should see a transition box with four triangles. Click on it, then Properties. Here, you will find a drop-down menu with a wide selection of types. Select one and adjust the settings accordingly. Keep in mind that you can cross between audio tracks in videos, they can be useful.
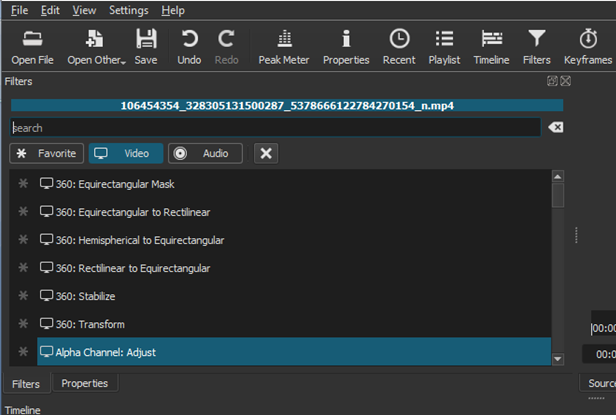
- In the Filters menu, you have several effect choices. For example, there are style filters, confirmation tools, Chroma Keys, and many more.
To add one to a video, open the Filters menu, click, + button, and select your favorite filter from the three options (Favorites, Video, and Audio). Here, configure the filter settings and see how the change is applied.
You can add multiple filters in one clip, but do not go crazy, especially in long videos! To disable the filter effect, clear the checkbox. You can remove it completely from the clip with the – (minus) button.
Assemble the soundtrack
If you are cutting scenes, there is a nice change that will benefit your video by having an integrated soundtrack. It may be a few atmospheric sounds or it may be music in the background. NeoFilm allows you to mix existing audio with the additional soundtrack, which is often fine.
- If you want, you can mute the audio coming from the clips.
- You can record the vocal cords to add to the video. However, you should keep in mind that if you do this, you would want to match the videos to the audio and the length of the audio track.
- Whatever it is, when the audio is ready, import it in its own way.
Add captions
Many videos only need captions to add captions. NeoFilm allows you to add two types of title, standard text, and 3D text.
- Both options are available from the Filters> Video menu.
- For the text option, you can enter the phrase you want to use in the box.
- Some of the preset options are also available, such as the option to display a video timeline.
- You can set the font, color, and drag the text around the screen.
Export your video in the correct format
Eventually, you will be ready to export the finished video.
- Stick with the default export options and click Export to get started.
- When you have a wide selection of publishing formats, it is best to stick with the simple, default option.
- If this does not fit your planned upload, try an alternative format.
- The export file may take some time to prepare. Even for a one-minute video, you have to go and do something else.
Note: You can adjust the resolution and the aspect ratio, change the codec and make some changes to the audio bitrate before exporting.
The file will be available for you to view and export. If you are happy, go ahead and save it. Otherwise, you can go back and re-export in a different format.