Mixing the sound with video using NeoFilm
Editing the video and audio is now easy with NeoFilm. There are still lots of features, which the pro sound editor would want to try. In this context, mixing the sound with video can be a good feature to be used by the users. Although, we have seen a lot of video editing feature and discussed each part in detail in the previous write-ups.
The title speaks itself; mixing is something we can relate to with multiple tracks merging at one file and also with the video track. Therefore, with an easy to edit tool like NeoFilm, no reason to skip this useful feature and not to do any more experiment at all. Here, we can see the there is maybe a sequence where we can enhance the editing further with the correct music background.
Here, we are not ignoring the original sound; indeed, we are going to use the mixing feature while applying the variation of the volume and its levels.
Here are the steps of how you can add a mixing background sound to a video track-
- First, you need to import the audio files.
- Now, you have to save the video track’s segment in the project file of NeoFilm video editing software.
- To do this, export is the most preferred option and format for such files like MP4 and. MOV.
- This step will complete some other things as well.
- Now, you select the video in its current form along with all the sequences editing that you have done.
- Keep in mind that the video should be in its natural form/raw soundtrack.
- Now, export the video immediately will save a lot of time, and it will yield the single, un-segmented video. It will make it more easy for you to mix the sound for the whole track at once.
- Alternatively, it can define the new segment, in case it is appropriate for you to apply the audio filters.
- Here you can hit the “Export” button, which is available at the right side of the primary Toolbar, which shows the below panel
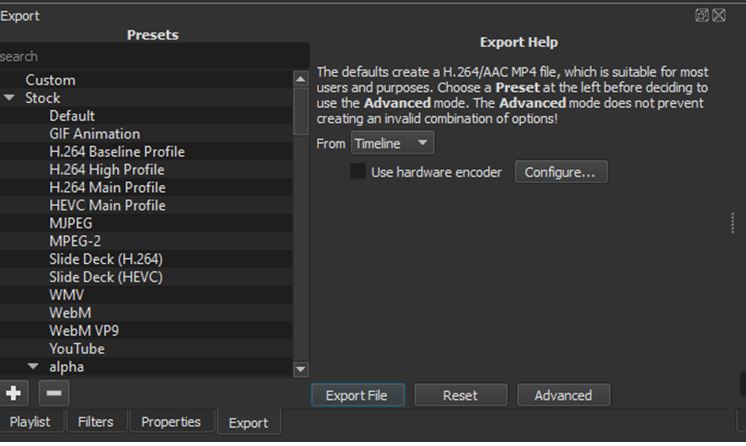
- NeoFilm video editing software has lots of the export and format options. In addition, it has other choices as well.
- Once you click on the option “Format,” a dropdown will be displayed here, which has the list of available video formats in an alphabetical order.
NeoFilm software suggests you the MP4 format to export, along with the resolution, frame-rate, aspect ratio, and more parameters, which seems to be more inherited from the real video click.
Here, if you collected the sequences of the video clips from the disparate source and with the different format parameters, NeoFilm software could make the best guess and “average” of the default suggestions of exporting a file. Also, it would be good the use the second-guessing of your selections; however, you don’t need to do it in the above case.
- Now, you will have to select the default options and click on the “Export file” option.
- This action will prompt you to select the file name (Ex- baby smile.mp4) and save it to the location.
- Once you double click on the completed item under the jobs panel, it will now open your track in the source window. Also, it will start playing automatically.
- Remember, it is not the part of your project, and it is still available for more editing.
- For further editing, you can add it in the playlist, and then from there, you can add to the timeline where the other projects are also available.
- Now, you need to decide where what actually you want to do with the audio files. You can add/mixing them with the existing project, close the project, then open the option of file exporting in a completely new project.
- You can now create multiple versions of the uploaded media available in your playlist.
- Under the timeline, using the option “Add/Append [use the Plus (+) button] under the timeline toolbar may not be the correct process because it is layed out already in 2 segments.
Note: To avoid any issues, you can create a new video track by using the step-[Menu>”Add Video Track”]. Now, you can see the highlighted new track; just append the MP4 track into the track at zero point.
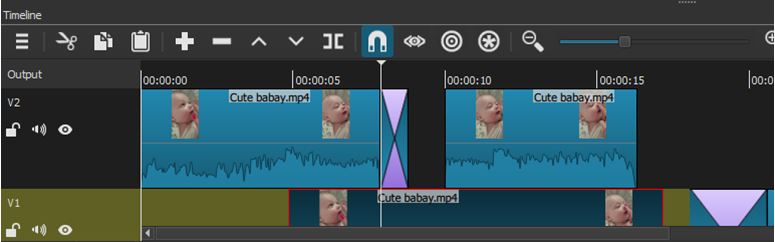
All the different tracks will now be simply added to each ever. Here, you will need to take care of balancing levels. This may cause clipping but will prevent the levels changing uncontrollably. In addition, when mixing multiple audio tracks, you will have to make sure that there’s Headroom or that you apply the normalized filters. Also, possibly the gain/volume filter you can read a more extensive description on the release announcements page.