In the third part of the mixer sound and editing article, we are going to see the further editing and how the track looks after the background music adding. In this screenshot, then see the wave-form of audio 1 (A1) is clearly visible, and also I can hear ear sound when you hit the play button. Here you cannot use one theme how you can mute the icons for the other available three tracks, which are now different. For further confirmation that each of the three tracks is now muted.
You can also see the track in the zoomed timeline view. Now you can see both copies off the track have been pasted end-to-end also, the endpoint0of of the A2 audio tracks is considerably shorter than the other tribes A1 and A3. Therefore here you can notice that the Slate which you have made at a certain point in that it a one track.
The theme statement
In the audio track, you can notice one initial statement of the theme there is one more 4 bar Bridge or a kind of transition. You can see the difference between the wave-form shape and the array statement of the previous original theme. It has now more instrumentation at the beginning where you have put the split.
The actual first piece of work with the visibility of the video track and the other musical theme which are combined are more good to see.
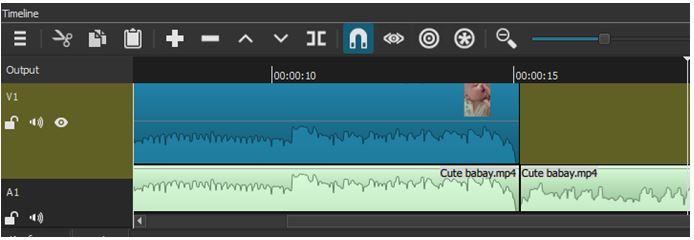
The sections of the video
However, in the background editing process, the section of the video has been divided into 20 seconds portions, even the video was 30 seconds longer. So sometimes, you can see a mismatch in length, but that is manageable by editing the video.
The wave-form itself can show you some hints where are you can see how close the crowded is to the track. In case you want to verify it, you can drag NeoFilm’s peak meter down and closer to the available timeline.
The track’s position
Here you can assume the track’s position in horizontal instead of the vertical orientation, and this shows that the peak meter is reading the original audio, which was captured in V1. It is now showing the ideal level of 17 dB. Also, hair the peak meter can go all the way a means pass – 5, which is turning the Warning in yellow colour, then in orange colour at the very tip. You can also observe that the available videos sound is is too loud, and also it is distorted too much of its original length.
Experimentally you can apply both the options like volume/gain filter, bass/treble filter to the available track.
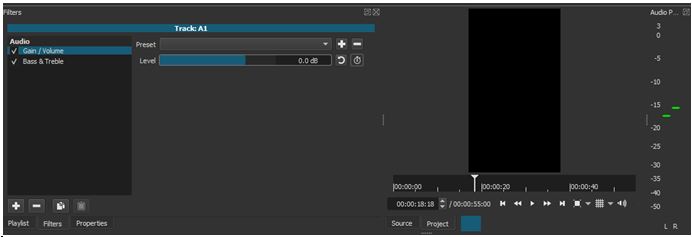
Note– Here you need to select the A2 track and open the available filter panel, then search among the audio filters for the correct one and then you can double click on each track.
If you are utilizing the controls available in the two filters, you can down the bass significantly and gain some more in general, which you can also notice in the peak meter by moving it downward in real-time. This option helps you to a certain level, which is less dangerous for you. In this way, you can make the peak meter more convenient.
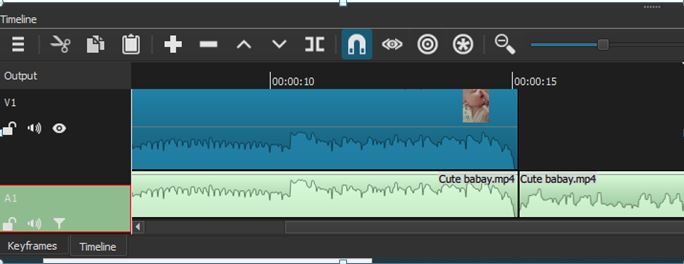
How the peak level looks?
After the peak level looks fine, you can go for a further process. Sometimes you can see the volume of the A2 track is considerable e because of some distortion. It still remains when you play the A2 track. Sometimes this kind of distortion indicates that it is kind of an artifact of the original recording, and I just cannot add it anymore.
Now you can move to the A3 track Institute of Editing the A2 track. You can see or observe that the A3 track looks right because it has been structured or segmented closer to the 30 seconds length, similar to the video clip.
The second segment becomes too heavy along with the instrumentation, which has the rock style. Therefore similar to the second track, the present track is also too heavy for you to use in the first 30 seconds it was perfect for editing in terms of the length and the selected mood.
- You can delete the other two tracks from your timeline, and also, you can delete the duplicate length of the same video track clips from v1.
- Again, you can make some splits available A3 track up to 4-5 seconds just after your video ends.
- Also, you can delete the reminder, which is non-usable and here is your timeline now
Note: The reason for deleting this file is to you just don’t want to keep this track as a final product while exporting.