When you start editing the video using NeoFilm, you will find many options on the timeline. While playing a long video of speech, narration, there are so many pauses and filler word, which may make the file longer. To save the playing time, you can mute the unnecessary part of the track. In this guide, we are going to describe how you can mute part of the video using NeoFilm video editing software.
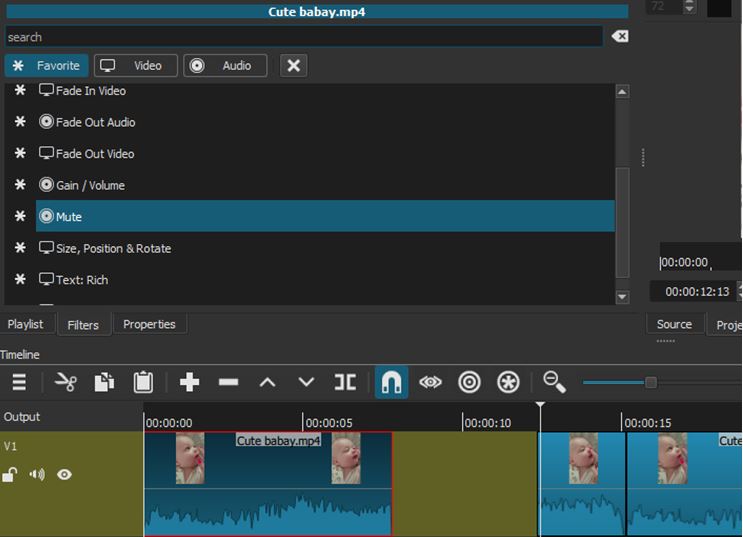
In the below mentioned screenshot, you will find a video already opened on the timeline as V1. With this video, there is a segment, where the filler voice is recorded. Now you will have to pause it and start muting the part of your video.
How to mute part of the video
- While muting part of the video, you need to keep in mind that, you cannot do this by deleting the particular segment. You need to specify the “Skip” which should be noticeable in the motion of video.
- Skipping the video will be quite annoying; however, you can assume it as you have chosen this, instead of the video.
- Here, deleting the selected segment can cause some disruption, as the video part will also be deleted, so selecting the section and split it would help here.
- Now, apply the filters to the particular selected segment and try to change some properties of the video.
- While following the above option, both videos will have an option to mute the part of the video. In addition, the other part of the video will be played without any interruption.
- Using this option, you can apply any filter, which you want into the video, and the clip will not visible in the playlist. However, if you choose it on timeline, it will be covered under red color border (the selected area).
- Now, open the panel of filters, here you can select the Mute filter from Favorites or from more extensive audio filters list.
- If you double click on the filter, it will apply on the selected part of the video.
- Here, you will not see any dialog for the different setting or options. There are no other options available with this filter, as you have muted audio for the particular duration of the part.
- Now see the properties of the mute option, you can customize it as per your preferences.
How to adjust the balance
- By checking the properties of the muted part, you can adjust / fade in or fade out the video.
- The balance between two channels (left and right) is called stereo; here you can add the effects like expander, compressor, delay and reverb, etc.
- All of the above effect will make a little change to the video if applied to any longer segment or to the whole track.
- One more way to mute the part of video is to check the properties and make some adjustments then apply on the segment.
- With the selected V1 track, you can see the panel of properties via main toolbar, then with this, you can click on the “Audio Tab” to get more results.
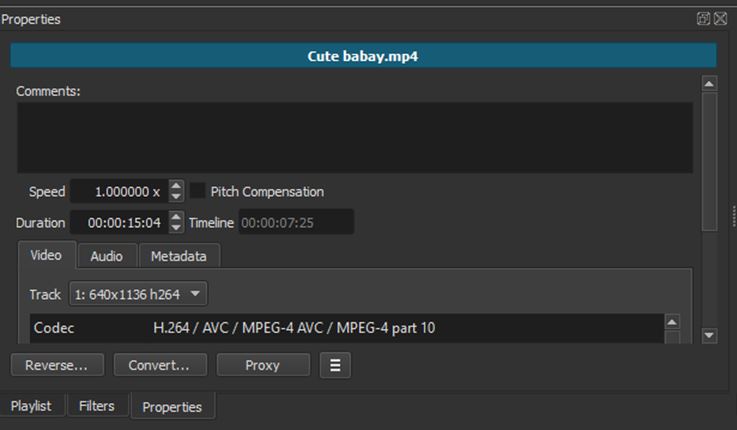
- After clicking on the properties, it will display some not editable properties of the track for the particular segment.
- The properties will be same for all the audio of V1 track. However, the track is also a dropdown control.
- If you click on this, you will find two options- One is the current time playing track name, and second is “None.”
- If you choose “None”, the entire read only options will disappear and the audio as well for the particular segment will be shown as muted.
- The wave-form of the audio will be visible in the segment on the timeline, as it was before you applied the mute filter.
- This is a kind of reminder to the users that particular section of the audio has been destroyed or muted, while you keep the project as open or you save it.
- Here, you can go back any time and un-mute the audio part, which you want to, chose. Also you can reverse to mute option which you have selected before.