One thing we already know is that the uploaded clip on NeoFilm itself, although is a high-resolution film of a compelling, moving image. It does not take long to hear the audience in most contexts. If you would like to end with a long final video, if any, of at least a 1-minute range, here is how you can do this.
One can copy that entire video clip and paste it back and forth on the V1 track for a full minute or more.
But the six repetitions of the same short clip appear to be odd (at least for the existing video; some of the captured movements may be repetitively humorous or interesting).
How to extend it, or reduce the playing time?
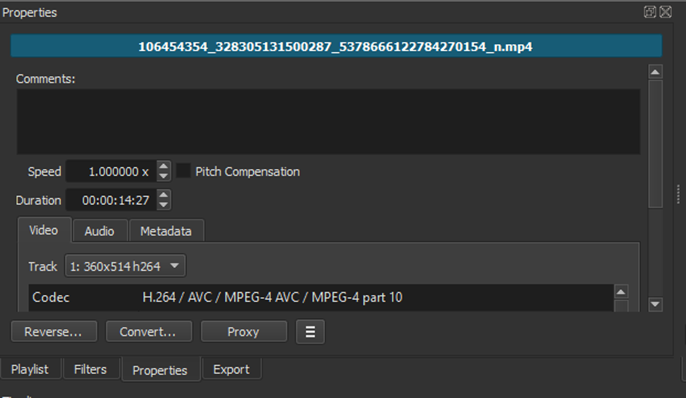
- Go to the Properties panel for that clip.
- Change the speed set to default real-time or 1.000 X, 0.1x, or 10% real-time.
- The results on the timeline are now: The V1 track is now over 1 minute long
As we play it, we see the same video, now flowing for a full minute, but at glacier-slow speeds.
How to combine the video clip with other thematic short videos?
- Go back to the videos folder on your computer and look for more video clips, especially similar themes.
- Find a similar range clip and bring it into the project and find out if it ‘works’ in this environment.
- A 15 seconds video clip will definitely worth a try.
- Now open each of these clips in NeoFilm and add each one to my playlist for this project.
Now you can see the additional clips you have added to the playlist, along with the original video clip. You can see the source view by manipulating left and right clip edges. Everything shown in blue in the source window is part of the clip, which by default is the full video you open. Clipping like this will be explored later.
Cutting
- Separate the clip with S
- Select the clip, which you want to cut
- Press C to copy the clip
- Under the Video Preview, select the Source tab to preview the copied clip
- Drag the clip from the video preview to the playlist
After the process, simply drag each short clip to the timeline to export. This method delivers multiple clips in a short time, which avoids cutting long video, exporting the clip, and then cutting another part of the extended video.
Pasting
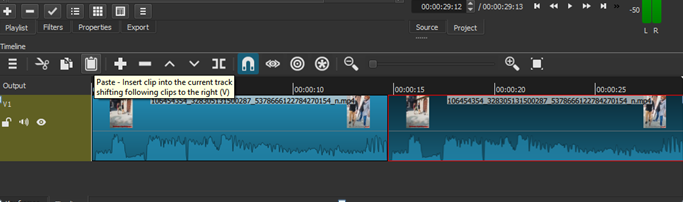
- After the cut is complete move the cursor (i.e. move the played) to the desired location of the clip, which is between the original video clip and the second clip.
- The clip using the glue button in the timeline controls to its new position you stick.
- This will turn all the remaining parts back to the right and protect them all completely.
- Paste the clip into its new position, using the Paste button on the Timeline controls.
- If you had used the overwrite button instead, it would have pasted the other clip in the same position. Still, it would have overwritten a portion of the video clip instead, without changing the others correctly.
- Note: In some cases, you may want to do that, for example, to protect the status of all other sections compared to other tracks in your project.
Appending
- To get a better starting point, you can start by selecting and sorting each new video clip in the playlist.
- Then press the Append (+) to append the video to the existing V1 Video in the timeline.
- You can leave the other clip if they are so long and thematically different from the others.
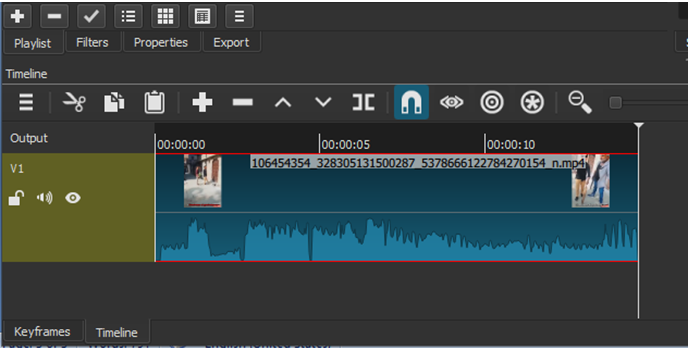
- It now gives the chronological view of our single video track V1, when zooming in to see the whole thing more or less.
- You will see, after the original video, each of the new clips has been added from left to right.
Transitions
NeoFilm offers a variety of transitions for switching from one video clip to the next. However, most of these are used by filters and will be the subject of an advanced option.
To create a dissolving transition, all you have to do is:
- Grab a clip – your mouse cursor will become a hand icon when you move a clip to the right – and drag
- It will slightly overwrite the adjacent clip, instantly right or left
- Then drop the clip you are pulling here, somewhat to the right so that the slow-mo overlaps with the second clip.
- The new cross-section shows what the interlocking or overlapping part was, and now it has become a dissolved transition.